Plant Overview
Known as the "Canary Rhododendron" for its luminous lemon-yellow blooms, this Himalayan treasure is a crown jewel for woodland gardeners. In its native high-altitude home, it paints the misty mountain slopes of Tibet and Nepal with a soft, buttery glow. While most wild rhododendrons favor pink or purple hues, this species is world-renowned for introducing rare yellow pigments into modern garden hybrids.
🔍 How to Identify
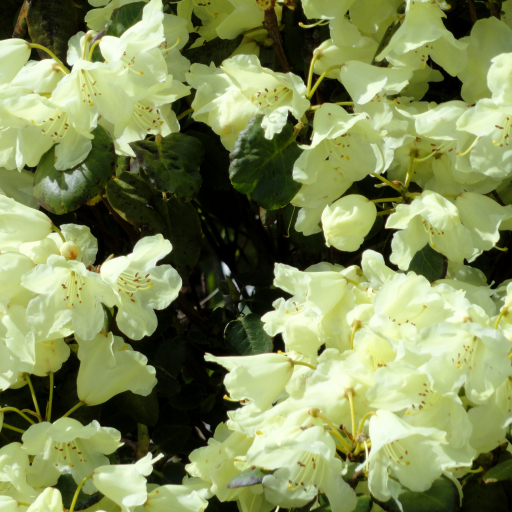
- 🌼 Bell-Shaped Blooms: The flowers hang in elegant, nodding clusters of 6 to 10. They are perfectly bell-shaped (campanulate) and range from pale cream to a rich, sulfur yellow, often featuring a small purple blotch at the base.
- 🍃 Rounded Foliage: Unlike the long, pointed leaves of many cousins, these leaves are distinctively oval or nearly circular. They are a deep, matte green on top with a pale, almost bluish-white waxy coating underneath.
- 🪵 Compact Structure: It typically grows as a neat, rounded shrub. The bark on older specimens is smooth and can develop a beautiful cinnamon-colored peel.
🏡 In Your Garden
- ⛰️ High-Altitude Needs: This plant dreams of the Himalayas; it craves cool, humid air and consistent moisture. It struggles in hot, stagnant lowland summers and requires "dappled shade" to protect its delicate flowers from wilting.
- 🥣 Acidic Appetite: Like a true Ericaceous plant, it requires a very low soil pH. It is extremely sensitive to lime or calcium; if your soil isn't naturally acidic, it is best grown in a large pot with specialized peat-free ericaceous compost.
- 🛑 Do Not Disturb: It possesses a shallow, fine root system that hates being moved once established. Avoid digging near the base of the plant, as surface root damage can lead to a quick decline.
⚠️ Safety & Toxicity
- 🚫 Highly Toxic: Every part of the plant—from the nectar in the flowers to the leaves and bark—contains grayanotoxins. It is considered dangerous if ingested.
- 🐾 Pet Warning: Dogs, cats, and livestock are particularly susceptible. Ingestion can lead to vomiting, cardiac distress, and in severe cases, paralysis. Keep this beauty out of reach of curious chewers.
✨ Fun Fact
📜 The Curved Secret: The name campylocarpum comes from the Greek words kampylos (curved) and karpos (fruit). If you look closely at the seed pods after the flowers fade, you will notice they have a distinct, sickle-like hook!

Detailed Care Instructions
To grow Rhododendron Campylocarpum, follow these steps:
- Choose the right location: Rhododendron Campylocarpum prefers partially shaded areas with dappled sunlight or morning sun and afternoon shade. The soil should be well-draining, slightly acidic (pH 4.5-6), rich in organic matter, and moist but not waterlogged.
- Prepare the soil: Add organic matter such as compost or well-rotted manure to improve the soil's texture and nutrient content. Dig the area to a depth of about 12 inches and remove any weeds or rocks.
- Planting: Dig a hole that is slightly wider and deeper than the root ball of the plant. Place the rhododendron in the hole, ensuring that the top of the root ball is slightly above the soil level. Fill the hole with soil, firming it gently around the plant to eliminate air pockets.
- Watering: Water the plant thoroughly after planting and keep the soil consistently moist, but avoid overwatering. During dry spells, water deeply at the base of the plant rather than overhead, which can cause leaf diseases.
- Mulching: Apply a layer of organic mulch around the base of the plant to help retain moisture, suppress weeds, and provide insulation to the roots. Avoid placing mulch directly against the stem of the plant to prevent rot.
- Fertilization: Rhododendrons benefit from a balanced, acid-forming fertilizer specifically formulated for acid-loving plants. Apply the fertilizer according to the manufacturer's instructions, usually once in early spring and then again after flowering.
- Pruning: Prune dead or damaged branches and shape the plant after it finishes flowering. Prune lightly to maintain the natural form of the plant.
- Protection: Protect the plant from extreme cold, strong winds, and harsh sunlight. Consider using a windbreak or providing some shade during hot summer afternoons.
- Pest and disease control: Watch for common issues such as root rot, powdery mildew, aphids, and caterpillars. Apply appropriate treatments if necessary, following instructions carefully.
- Monitoring and care: Regularly check the plant for signs of stress or disease. Monitor soil moisture levels and adjust watering accordingly. Provide consistent care to promote healthy growth and flowering.

Place in a window with dappled sun or a spot in the middle of a room. Or directly in a window facing west or east.

When watering this plant, it is important to ensure that the soil is moist but not waterlogged. Overwatering can result in root rot and other plant diseases. It is recommended to water the plant in the early morning or in the evening when the sun is not too strong, to prevent evaporation of the water.
The plant should be watered deeply until the water runs out of the drainage holes. This will ensure that the water reaches the roots of the plant. The frequency of watering depends on various factors such as the weather conditions, humidity, soil type, exposure to sunlight, etc.
During the growing season, the plant may require more frequent watering, while in cooler months, the watering can be reduced. It is also important to monitor the plant for signs of dehydration such as wilting leaves or yellowing.
Finally, it is recommended to use room temperature or tepid water for watering the plant as cold water can shock the roots. Overall, it is important to establish a watering routine that suits the plant's specific needs and environment.
To fertilize this plant, use a slow-release fertilizer specially formulated for acid-loving plants. Apply the fertilizer in early spring, before new growth appears, and again in early summer. Be sure to follow the manufacturer's instructions for application rates. Avoid applying fertilizer too close to the trunk or stems of the plant, as this can cause damage. Water the plant thoroughly after fertilizing to help it absorb the nutrients.
Rhododendron campylocarpum requires a specific soil type to thrive. It prefers a soil that is acidic with a pH between 4.5 to 6.0. The soil should also be well-draining and high in organic matter, like peat moss or compost. The plant is sensitive to excessive lime or alkaline soil, so it is important to ensure that the soil is acidic. It is also recommended to avoid planting the rhododendron in heavy clay soils, as they can have poor drainage and limit root growth. Overall, Rhododendron campylocarpum requires a soil that is acidic, well-draining, and rich in organic matter to thrive.
To propagate this plant, you will need to take stem cuttings from a healthy specimen. Select a stem that is at least 4 inches long and has several sets of leaves. Cut the stem with a sharp, clean scissors just below a node where a leaf attaches.
Remove any leaves from the bottom 2 inches of the stem, leaving at least two sets of leaves at the top. Dip the cut end of the stem into rooting hormone powder and tap off any excess.
Plant the stem cutting into a container of sterile potting soil, burying the bottom third of the stem. Water the cutting thoroughly and cover the container with a plastic bag to create a humid environment.
Place the container in a bright, indirect location but not in direct sunlight. Make sure the soil stays moist but not waterlogged. After a few weeks, the cutting should produce new growth, which is a sign that it has successfully rooted. Once the new growth is visible, gradually acclimate the plant to lower humidity and brighter light until it is ready to be transplanted into a larger container or garden bed.


