Plant Overview
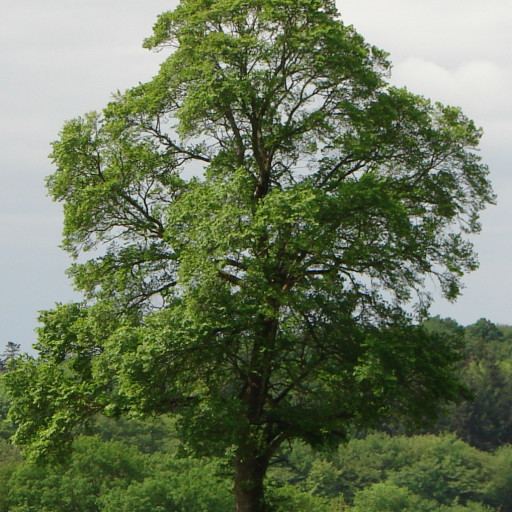
Once the king of the European countryside, the Field Elm (Ulmus minor) is a resilient survivor with a storied past. Known for its rugged, textured bark and elegant spreading canopy, it has weathered the storm of Dutch Elm Disease better than many of its relatives by regrowing from its roots. In ancient folklore, elms were often seen as guardians of the meadows, marking the boundary between the wild forest and the farmed field.
🔍 How to Identify
- 🍃 Asymmetric Leaves: The most famous "elm" trait—the base of the leaf is lopsided, with one side of the blade attaching to the stem lower than the other.
- 🪵 Diamond Bark: While young trees are smooth and grey, mature Field Elms develop deep, corky furrows that often create a distinct diamond-shaped pattern.
- 🎐 Papery Fruit: In spring, the tree produces "samaras"—flat, circular winged seeds that look like tiny translucent coins designed to be carried by the wind.
🏡 In Your Garden
- 🌳 The Sucker Struggle: If you plant a Field Elm, be prepared for "suckering." The tree frequently sends up new shoots from its root system, meaning you might find "baby" elms popping up several feet away from the main trunk.
- 💧 Tough as Nails: This tree is incredibly adaptable to different soil types, from heavy clay to sandy loam. It is particularly valued in urban settings because it can withstand soil compaction and pollution better than most hardwoods.
⚠️ Safety & Toxicity
- ✅ Non-Toxic: The Field Elm is considered safe and non-toxic for dogs, cats, and horses.
- 🤧 Pollen Alert: While it won't hurt your pets, it is a wind-pollinated species. In late winter or early spring, it releases heavy amounts of pollen that can trigger seasonal allergies in sensitive humans.
✨ Fun Fact
Before the industrial revolution and the invention of metal piping, the wood of the Field Elm was the go-to material for underground water pipes. Because elm wood is uniquely resistant to rot when kept permanently wet, hollowed-out elm logs served as the water mains for the city of London for centuries!

Detailed Care Instructions
| Humidity | Normal |
| Lighting | Full Sun |
| Difficulty | Easy |
| Hibernation | Cold Period |
To grow an Ulmus minor plant, also known as field elm or English elm, you can follow these steps:
- Choose a suitable location: Ulmus minor prefers full sunlight or partial shade and well-draining soil. Ensure there is enough space for the plant to grow tall and wide.
- Obtain a sapling or seeds: You can either purchase a small Ulmus minor tree from a nursery or obtain seeds from mature trees. If using seeds, collect them in autumn when they are ripe and sow them immediately.
- Prepare the planting area: Clear the area of any weeds, rocks, or debris. Loosen the soil with a garden fork or tiller to help with good root penetration.
- Planting the sapling: Dig a hole large enough to accommodate the root ball or container the sapling is in. Gently place the plant in the hole ensuring it is level with or slightly above the surrounding soil. Backfill the hole with soil, firming it gently around the roots. Water the plant thoroughly.
- Planting from seeds: Sow the seeds directly into the prepared soil. Cover them with a thin layer of soil and water lightly. Keep the soil moist until germination occurs.
- Watering and maintenance: Water the plant regularly, especially during dry periods. Ensure the soil remains moist but not waterlogged. Mulching around the base of the plant can help retain moisture and suppress weed growth. Prune away any damaged or diseased branches as needed.
- Fertilizing: In the first year, it is generally not necessary to fertilize the Ulmus minor plant. However, in subsequent years, you can apply a balanced slow-release fertilizer annually in the early spring to promote healthy growth.
- Pests and diseases: Ulmus minor trees can be susceptible to Dutch elm disease. Ensuring good air circulation, regular pruning, and promptly removing any infected branches can help mitigate the risk. Additionally, monitor for aphids, caterpillars, or other pests that may attack the plant, and take appropriate measures to control them if necessary.
By following these steps and providing proper care, your Ulmus minor plant should grow and thrive.

Place in a window with dappled sun or a spot in the middle of a room. Or directly in a window facing west or east.

To water this plant, wait until the top inch of soil feels dry to the touch before watering. Avoid overwatering, as this can lead to root rot. Water thoroughly, making sure the entire root ball is moistened. Allow any excess water to drain away and do not let the plant sit in standing water. The amount and frequency of watering may vary depending on environmental factors such as temperature and humidity. It is important to closely monitor the plant and adjust watering accordingly.
To fertilize this plant, apply a balanced fertilizer with equal portions of nitrogen, phosphorus, and potassium in early spring. Apply again in midsummer and early autumn. Use a slow-release fertilizer to ensure steady and continuous nutrition. Avoid applying fertilizer during dormancy or very hot weather. Water the plant thoroughly before and after each fertilization to minimize stress. Follow the manufacturer's recommendations regarding application rates and methods.
The recommended soil for Ulmus Minor is a well-draining, loamy soil that is moist but not waterlogged. It should have a slightly acidic to neutral pH range of 6.0-7.5. The plant prefers soil that is rich in organic matter and nutrients, and it benefits from periodic applications of fertilizer. It is important to avoid using heavy soils that retain excess moisture, which can cause root rot and other problems. Additionally, the plant should be spaced appropriately to prevent crowding, and it should receive adequate sunlight and water to thrive.
To propagate this plant, take a softwood cutting in the early summer while the plant is actively growing. Choose a branch that is about 6 inches long and has several sets of leaves. Remove the leaves on the lower half of the stem and dip the cut end in rooting hormone. Plant the cutting in a pot filled with a well-draining soil mixture and keep it moist. Place the pot in a location with bright, indirect light and keep the temperature consistently warm. After several weeks, roots should begin to form and the cutting can be transplanted into a larger container or outside in a suitable location.


