Plant Overview
The cheerful garden pansy, or Viola × wittrockiana, is often called the "flower with a face" due to the distinctive dark blotches in the center of its petals. These hardy hybrids were created in 19th-century Europe by crossing wild wildflowers like the Heart’s-ease (Viola tricolor). Beloved for their incredible range of colors and ability to bloom when other plants are shivering, they are the undisputed royalty of the cool-season garden.
🔍 How to Identify
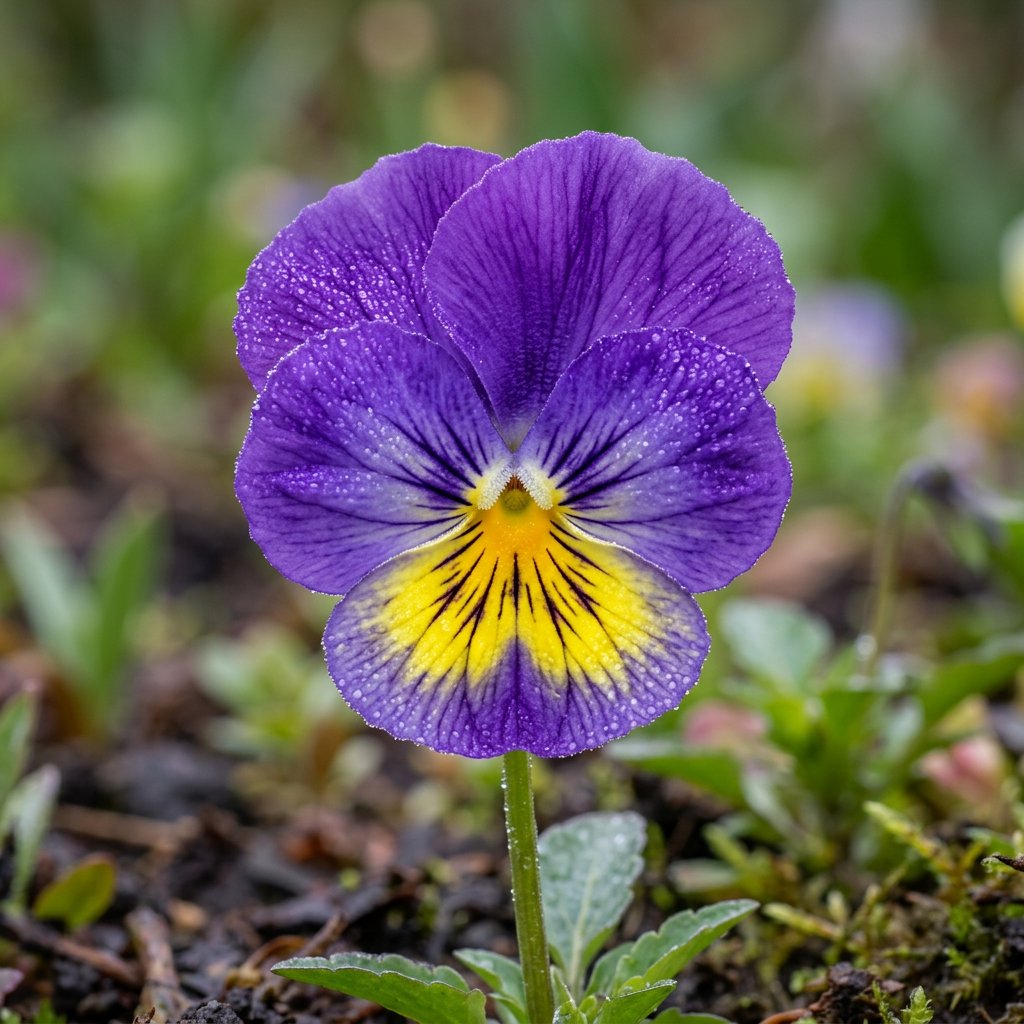
- 🌸 The "Face": Most varieties feature five large, overlapping, velvety petals with a dark central "mask" or blotch that looks remarkably like a tiny face.
- 🍃 Leaf Structure: Look for deep green, oval, or heart-shaped leaves with slightly scalloped (crenate) edges that grow in a compact rosette.
- 📏 Growth Habit: These are low-growing plants, rarely exceeding 6 to 9 inches in height, making them perfect for "living rugs" in flower beds or containers.
🏡 In Your Garden
- ❄️ Cool Weather Lovers: Unlike most garden stars, pansies despise the summer heat. They are true "shoulder season" plants that thrive in the crisp air of early spring and late autumn, and in warmer climates, they can even bloom through the winter.
- ✂️ The Deadheading Trick: To keep the "faces" coming, you must be diligent about pinching off faded flowers. This prevents the plant from putting energy into seed production and forces it to produce more colorful blooms.
- 🥣 Hungry Growers: Because they produce so many flowers in a short window, they appreciate nutrient-rich soil. If they start to look "leggy" or stretched out, it’s usually a sign that the temperature is rising too high for their comfort.
⚠️ Safety & Toxicity
- 🍽️ Edible Blooms: Pansies are famously edible! Their petals have a mild, slightly minty, or grassy flavor and are often used to garnish salads, desserts, or frozen into ice cubes.
- 🐾 Pet Friendly: They are generally considered non-toxic to dogs, cats, and horses. However, always ensure the plants haven't been treated with chemical pesticides or systemic fertilizers before letting a pet (or a human) nibble on them.
✨ Fun Fact
The name "Pansy" comes from the French word pensée, meaning "thought." In the Victorian "Language of Flowers," giving someone a pansy was a silent way of saying, "I am thinking of you" or "You are in my thoughts."

Detailed Care Instructions
| Humidity | High |
| Lighting | Full Sun |
| Toxicity | Poisonous |
| Difficulty | Easy |
| Hibernation | Cold Period |
| Temperature | 14°C - 39°C |
| Hardiness Zones | 10 - 7 |
To grow Viola x wittrockiana, also known as garden pansy or viola, follow these steps:
- Choose the right season: Viola x wittrockiana grows best in cooler weather. Plant them in early spring or late autumn when the temperatures are mild.
- Select a location: Find a location that receives at least 4-6 hours of direct sunlight each day. Violas can tolerate partial shade, but they perform best in full sun.
- Prepare the soil: Violas prefer well-draining soil with a pH between 6.0 and 7.5. Amend the soil with organic matter like compost to improve drainage and nutrient availability.
- Sow seeds or plant seedlings: You can start viola plants from either seeds or seedlings. If sowing seeds directly into the garden, scatter them over the prepared soil and lightly cover them with a thin layer of soil. Water gently. If using seedlings, dig small holes, spaced about 6 inches apart, and transplant them with care.
- Water regularly: Keep the soil evenly moist but not waterlogged. Water when the top inch of soil feels dry, ensuring that the water reaches the root zone.
- Fertilize: Apply a balanced, slow-release fertilizer according to the instructions on the packaging. This will provide essential nutrients for healthy growth throughout the growing season.
- Pinch back plants: To encourage bushier growth and more abundant flower production, pinch back the growing tips of the plants when they reach about 4-6 inches tall.
- Deadhead spent flowers: Remove faded flowers regularly to encourage continuous blooming and prevent seed production. This practice, known as deadheading, redirects the plant's energy into producing new flowers.
- Mulch: Apply a layer of organic mulch, such as shredded leaves or straw, around the plants to help conserve moisture, suppress weed growth, and regulate soil temperature.
- Monitor for pests and diseases: Keep an eye out for common pests like aphids, slugs, and snails. Treat infestations promptly to prevent damage. Also, watch for signs of diseases, such as powdery mildew, and take appropriate measures if needed, such as removing affected foliage.
With proper care and maintenance, your Viola x wittrockiana plants should thrive and reward you with beautiful, colorful flowers.

Place in a bright room that is sun drenched almost all day. Or directly in a south-facing window.

To water this plant, ensure that the soil surrounding the plant is completely dry before watering. Once the soil is dry, water the plant slowly and thoroughly until the water reaches the roots. Avoid getting the foliage wet while watering as this can lead to fungal diseases. Watering frequency will depend on the temperature and humidity of the plant's environment, but typically, this plant should be watered thoroughly once a week.
To fertilize this plant, you should use a balanced, water-soluble fertilizer with equal amounts of nitrogen, phosphorus, and potassium. Mix the fertilizer in water according to the package instructions and apply to the soil around the plant every two weeks during the growing season. Be sure to water the plant thoroughly before and after fertilizing. Avoid getting fertilizer on the foliage or flowers, as this can cause burning.
Viola X Wittrockiana prefers a well-draining soil that is high in organic matter. A mixture of loam, sand, and peat moss can be used as a basic soil mix. The soil pH should be between 6.0 and 7.5. Adding compost or other organic matter to the soil helps to improve soil structure and nutrient availability. It is important to avoid heavy clay soils, which can cause poor drainage and lead to root rot. When planting Viola X Wittrockiana, it is recommended to incorporate a slow-release fertilizer into the soil, or to fertilize with a balanced fertilizer every 4-6 weeks during the growing season.
Propagation of this plant can be easily achieved through vegetative methods such as stem cuttings. To do this, select a healthy and mature stem from the parent plant and cut it at a 45-degree angle using a clean and sharp knife or scissors. Ensure that the cutting is at least 4-5 inches long and has a few sets of leaves.
Remove the lower leaves from the cutting and gently scrape the bottom inch of the stem to expose the cambium layer. Dip the scraped end of the cutting into rooting hormone powder.
Prepare a potting mix suitable for seedlings or cuttings with a combination of vermiculite, perlite, and peat moss in equal proportions. Make sure the soil is moist but not waterlogged before inserting the stem cutting into the potting mix.
Cover the pot with a clear plastic bag or a plastic dome to create a humid environment and place it in a bright spot but away from direct sunlight. Ensure that the soil remains moist but not soggy throughout the rooting process.
After a few weeks, the cutting will start developing new leaves, and roots will start appearing from the bottom of the stem. Once the roots are at least an inch long, you can transplant the new plant into a larger pot or in the garden.
Common pests of the pansy include Aphids, thrips, whiteflies, larvae. Make a habit of checking your pansy frequently for pests so that any infestations can be caught and managed early.


