There’s nothing quite like the vibrant aroma of fresh basil, mint, or thyme wafting through your kitchen on a warm summer day. Starting a DIY summer herb garden from seed is one of the most rewarding projects a plant parent can take on. If you’ve tried growing herbs in the past and ended up with sad, droopy stems, don't worry—you are completely normal! Growing from seed can feel a bit intimidating at first, but with a little patience and the right know-how, you can easily transform tiny seeds into a thriving seasoning station. Plus, you’re not alone on this journey; the Plantiary app is always right in your pocket to help you track your plant's growth stages and set up a solid routine. Let’s dig in!
The Problem: Common Symptoms of Struggling Herbs
Even the most enthusiastic gardeners can run into a few bumps along the road when starting from scratch. When growing an herb garden, you might notice a few common issues popping up:
- Weak, floppy seedlings: Your tiny plants look exceptionally tall, thin, and unable to support their own weight.
- Yellowing, dropping leaves: The lower leaves on your herbs are turning pale, feeling mushy, and falling off.
- Blisters or bumps on leaves: The undersides of your herb leaves have strange, crusty little bumps.
The Causes: Why Are My Herbs Unhappy?
Understanding what your plants are trying to tell you is half the battle. There is no need to feel guilty; here is what is usually happening behind the scenes:
- Lack of adequate light: When seedlings don't get enough sunlight, they experience etiolation—a botanical term for when a plant stretches excessively to reach a light source. This results in weak, spindly stems that easily flop over.
- Poor drainage: Yellowing, mushy leaves are often a sign of chlorosis (a loss of the green pigment chlorophyll) caused by overwatering or dense soil. This suffocates the root system and leads to root rot.
- Inconsistent watering: Those weird bumps on your leaves are a sign of edema. This happens when the roots take up water faster than the leaves can release it, causing plant cells to swell and burst.
The Solutions: Step-by-Step Guide to a Thriving Herb Garden
Now that we know what pitfalls to watch out for, let’s build a successful summer herb garden from seed to seasoning using scientifically proven methods!
Step 1: Choose the Right Soil and Pots Herbs hate having "wet feet" (roots sitting in soggy soil). Select pots with plenty of drainage holes. Use a light, well-draining potting mix—adding a handful of perlite to standard potting soil works wonders for improving aeration and preventing root rot.
Step 2: Sow Your Seeds with Care Follow the depth instructions on your specific seed packets. A general botanical rule of thumb is to plant a seed twice as deep as its width. Mist the soil gently with a spray bottle to avoid washing the tiny seeds away. Keep the soil consistently moist (but not soaking wet) until they sprout.
Step 3: Provide Abundant Light Once your seedlings pop up, they need sunshine! Place them in a south-facing window or outside in a spot that receives at least 6 to 8 hours of direct sunlight daily. If you notice them leaning or stretching (etiolation), rotate the pots daily or supplement them with a simple LED grow light.
Step 4: Master Your Watering Routine Allow the top inch of soil to dry out before watering again. To prevent edema and root rot, water the soil directly at the base of the plant rather than splashing the leaves. Pro tip: If you struggle to remember when to water, set up a custom care schedule in the Plantiary app to get helpful, personalized reminders!
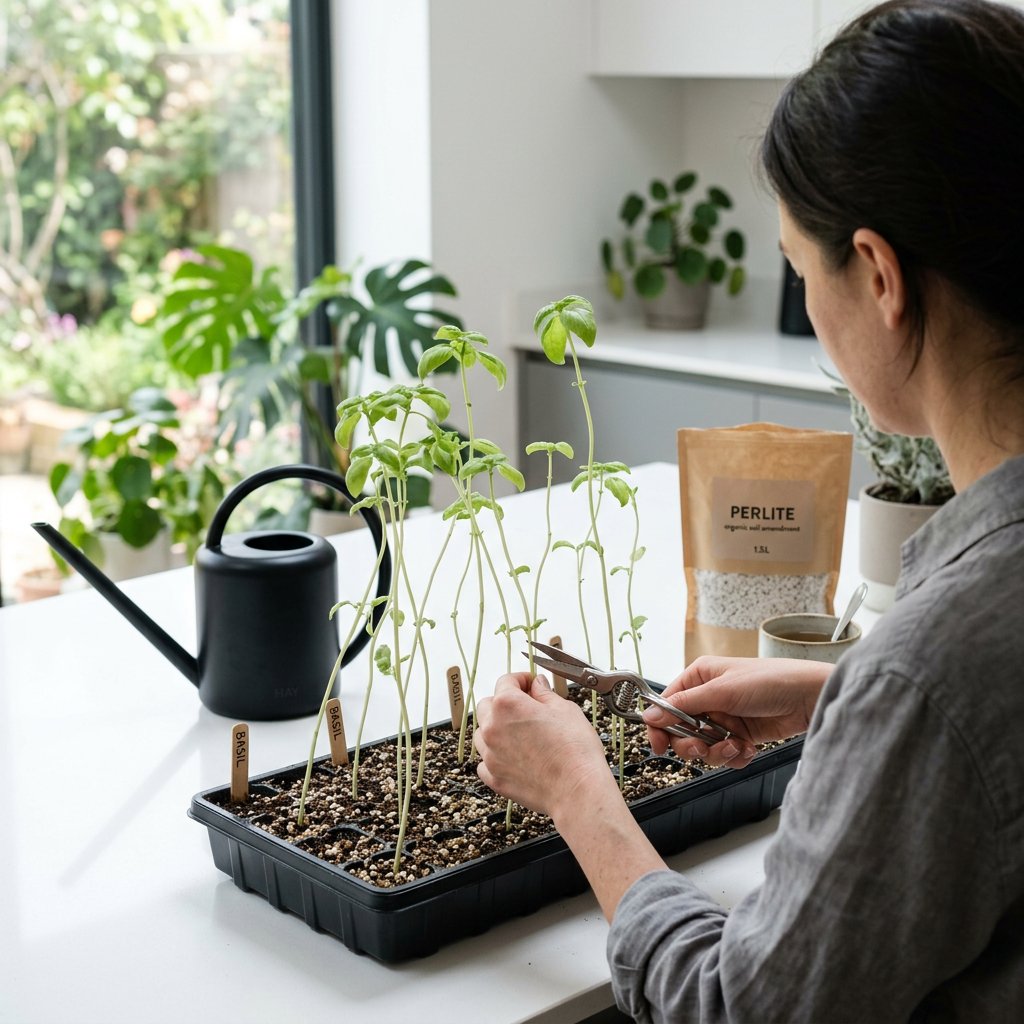
Step 5: Prune and Harvest Regularly Don't be afraid to snip your plants! Harvesting actually encourages branching. When you pinch off the top leaves of herbs like basil or mint, you trigger the plant to grow two new branches in its place, giving you a significantly bushier, healthier plant.
Troubleshooting On the Fly
If you ever spot strange discoloration, wilting, or suspect pests are munching on your precious summer herbs, don't panic. If you are unsure what is wrong with your plant, you can use the AI-powered plant disease scanner in the Plantiary app to get an accurate diagnosis and safe treatment options in seconds.
Enjoy the Fruits (and Leaves) of Your Labor!
Growing a DIY summer herb garden is a beautiful learning process. Some seeds might not germinate, and a leaf or two might turn yellow, but that is all part of becoming a seasoned plant parent. Keep your hands in the dirt, celebrate the small victories, and get ready to elevate your summer cooking with your very own homegrown seasonings!