Pothos plants are often praised as the ultimate beginner-friendly houseplant, famous for their fast-growing, cascading vines and forgiving nature. But even the most resilient plants can run into trouble, and if your once-vibrant pothos is looking sad, yellow, and wilted, you might be facing a very common houseplant hurdle: root rot. First, take a deep breath! Do not feel guilty if your plant is struggling. Plant issues, especially root rot, happen to every plant parent—even the experts. The good news is that pothos plants are incredible fighters, and with a little bit of care, you can nurse yours back to health.
The Problem: Signs of Pothos Root Rot
Because root rot happens beneath the soil, it can sneak up on you. By the time symptoms appear on the leaves, the roots are already struggling. Here are the most common signs to look out for:
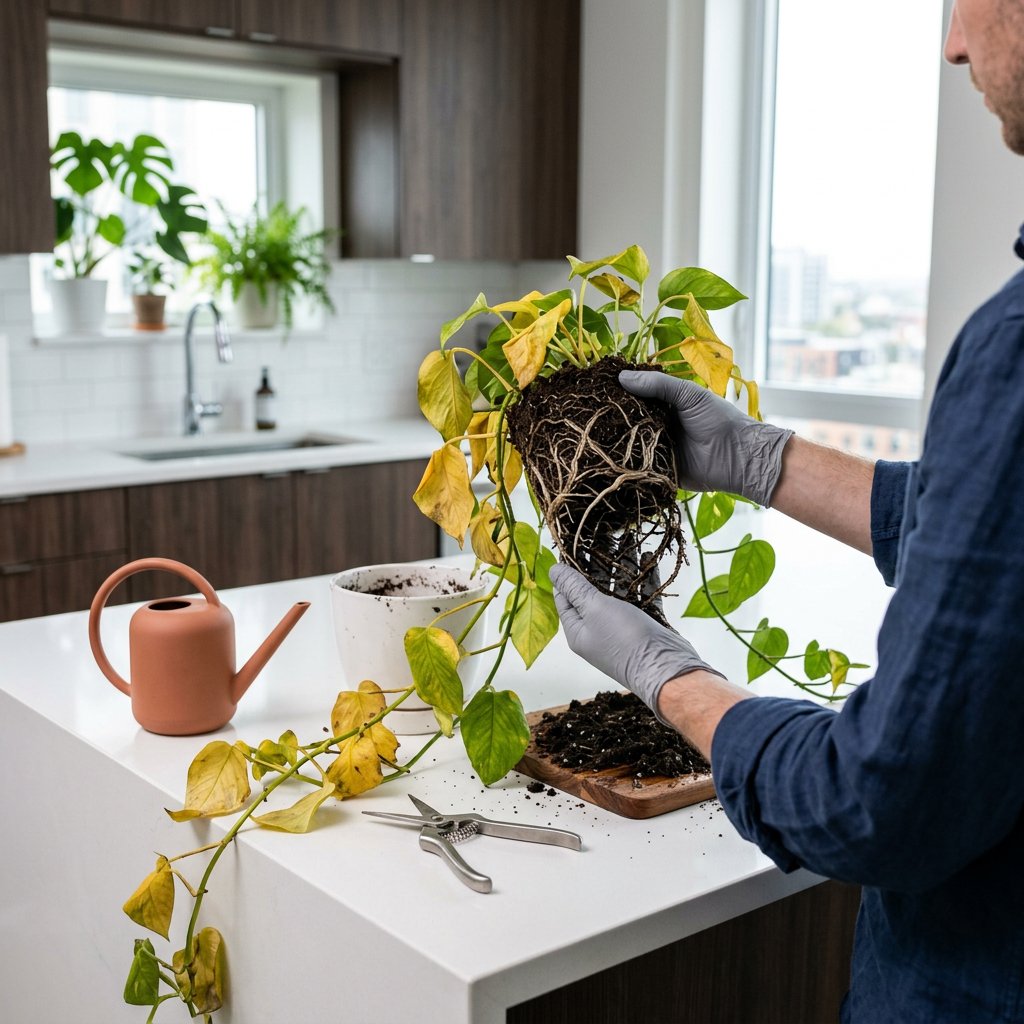
- Yellowing Leaves (Chlorosis): Chlorosis simply means a loss of green pigment. If your pothos leaves are rapidly turning yellow and dropping off, this is a major red flag.
- Wilting Despite Wet Soil: If your plant looks thirsty and limp, but the soil feels heavy and damp, the roots are likely too damaged to absorb water.
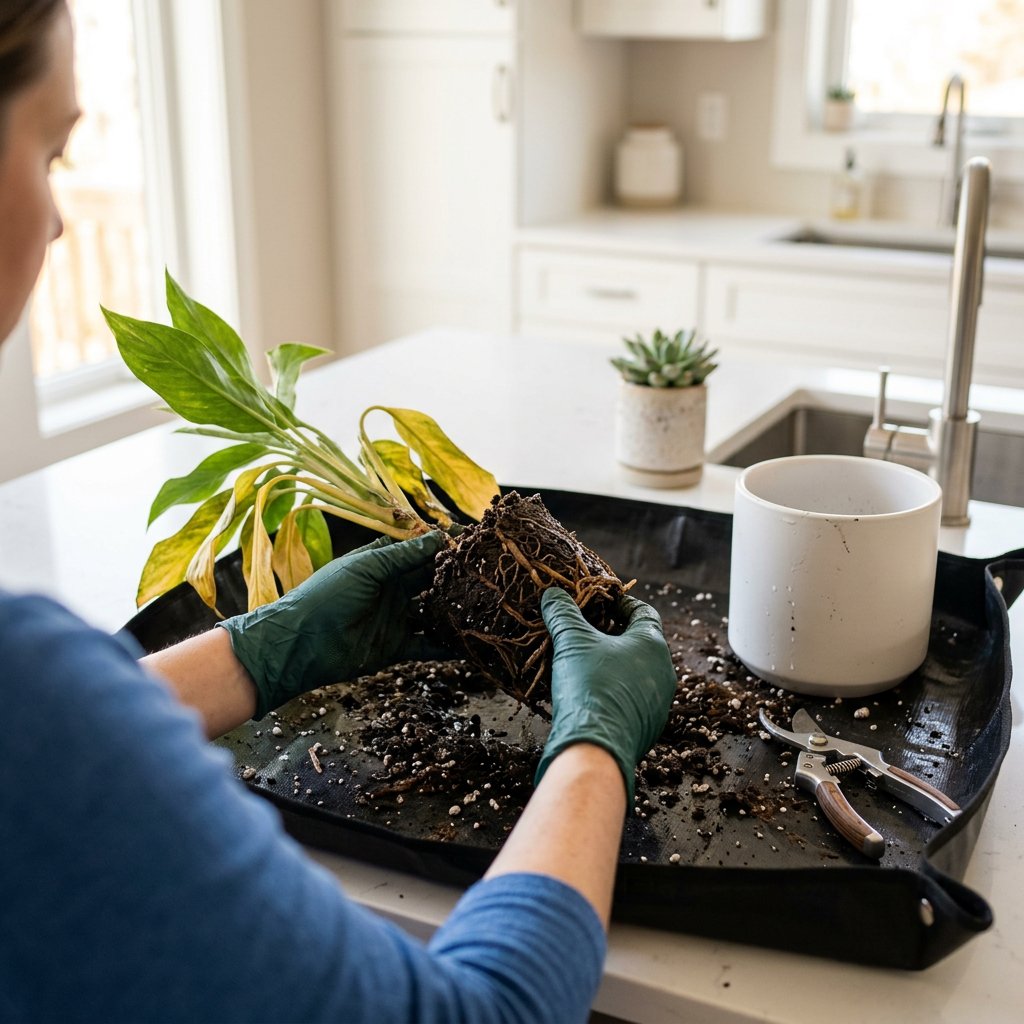
- Mushy, Brown Roots: Healthy pothos roots are firm and pale (usually white or light tan). Rotted roots are dark brown or black, slimy, and easily fall apart when touched.
- Foul Odor: A healthy potting mix smells earthy. If you sniff the soil and catch a sour, swampy, or rotten smell, fungal or bacterial pathogens are at work.
If you are unsure what is wrong with your plant, you can use the AI-powered plant disease scanner in the Plantiary app to get an accurate diagnosis in seconds before you start digging!
The Causes: Why Do Pothos Roots Rot?
Root rot is rarely caused by the watering itself, but rather by the lack of oxygen that follows. When a plant is overwatered, or if it lives in heavy soil with poor drainage, water fills all the tiny air pockets in the pot.
Without air, the roots essentially suffocate—a condition known as anoxia. Weakened, suffocating roots become the perfect target for soil-borne fungi (like Pythium or Phytophthora). These pathogens thrive in wet, oxygen-poor environments and will quickly multiply, turning healthy root tissue to mush.
Common culprits include:
- Watering too frequently without letting the top few inches of soil dry out.
- Pots without drainage holes at the bottom.
- Dense, compact potting soil that doesn't allow water to flow through freely.
The Solutions: Step-by-Step Treatment
Saving a pothos from root rot requires a little bit of plant surgery, but it is entirely doable. Follow these steps to stop the rot in its tracks:
Step 1: Unpot the Plant Gently remove your pothos from its pot. Lay down some newspaper or take the plant outside, as this process can get a little messy.
Step 2: Wash the Roots Carefully massage the root ball to loosen the wet, heavy soil. Rinse the roots under room-temperature running water. This washes away the fungal pathogens and allows you to clearly see which roots are healthy and which are damaged.
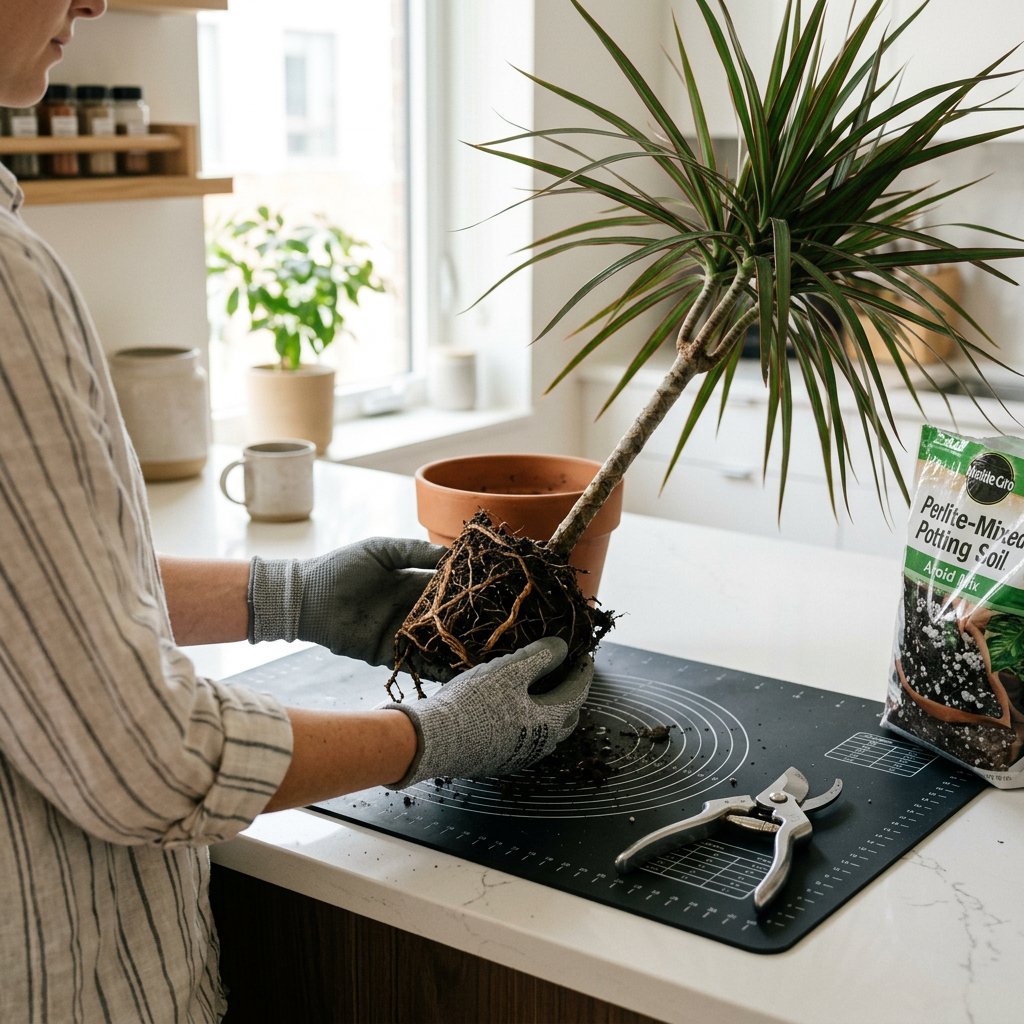
Step 3: Prune the Rot Take a pair of sterilized scissors or pruning shears (wipe them with rubbing alcohol first so you don't spread bacteria). Snip away every single brown, mushy, or stringy root. Do not be afraid to be ruthless! It is better to have a tiny healthy root system than to leave rotting tissue behind.
Step 4: Treat the Remaining Roots To kill off any lingering fungal spores, you can dip the remaining healthy roots into a mild hydrogen peroxide solution. Mix one part 3% hydrogen peroxide with two parts water, and let the roots soak for about 10 to 15 minutes.
Step 5: Repot in Fresh, Airy Soil Never reuse the old soil, as it is contaminated with rot-causing fungi. Wash the pot thoroughly with soap and water (or choose a new one with plenty of drainage holes). Repot your pothos in a well-draining, chunky mix. A blend of standard indoor potting soil mixed with a generous amount of perlite and orchid bark will provide the perfect airflow your plant needs to recover.
Step 6: Adjust Your Watering Habits After repotting, give the plant a light watering to help it settle, and then leave it alone. Going forward, only water your pothos when the top two to three inches of soil feel completely dry to the touch.
Recovering from root rot takes a lot of energy, so your pothos might droop a little for a week or two while it grows new roots. Be patient, provide it with bright, indirect sunlight, and let it heal. To prevent overwatering in the future, set up a customized watering schedule in the Plantiary app to remind you exactly when it's time to check the soil!