Spider plants (Chlorophytum comosum) are famous for being incredibly easygoing, making them a staple in almost every plant parent's collection. But even the most resilient houseplants can stumble, and if you are reading this, you might be worried about yours. Please don't panic, and definitely don't beat yourself up! Plant hiccups happen to all of us, from absolute beginners to seasoned botanists.
One of the most common issues these spindly, cheerful beauties face is root rot. Let’s walk through what it is, why it happens, and exactly how you can nurse your green friend back to health. And remember, if you are ever doubting a symptom or unsure what is wrong with your plant, you can use the AI-powered plant disease scanner in the Plantiary app to get a diagnosis in seconds.
The Problem: Spotting the Symptoms of Root Rot
Spider plants have thick, fleshy, tuberous roots—meaning their roots are specially designed to store water for dry spells. When they sit in soggy soil for too long, the roots are deprived of oxygen and literally drown. This creates the perfect environment for harmful soil fungi to multiply, leading to a condition called root rot.
Because the damage is happening beneath the soil, you have to look for above-ground clues. Here are the most common symptoms:
- Wilting while wet: The soil is completely soaked, but the plant’s leaves look limp and thirsty. This happens because the rotted roots are dead and can no longer absorb moisture to send to the leaves.
- Yellowing or browning leaves: You may notice a sudden wave of yellowing leaves, specifically starting near the base or center of the plant.
- Mushy base: The crown (the center where the leaves meet the soil) feels soft, squishy, and looks dark brown or black.
- A foul odor: If you lean in close to the pot, you might catch a distinctively sour, swampy, or decaying smell coming from the soil.
The Causes: Why Do Spider Plant Roots Rot?
Root rot rarely happens out of nowhere. It is almost always a combination of environmental factors that keep the soil too wet for too long:
- Overwatering: Loving your plant a little too much with the watering can is the number one culprit. Spider plants like their soil to dry out partially between drinks.
- Poor drainage: Pots without drainage holes at the bottom trap water inside. Similarly, using a dense, heavy potting soil holds moisture against the roots like a wet sponge.
- An oversized pot: If your plant is in a pot that is much too large for its root system, the excess soil holds onto more water than the plant can drink, creating a soggy environment.
The Solutions: Your Step-by-Step Rescue Plan
If you suspect root rot, time is of the essence, but rescue is entirely possible! Grab some rubbing alcohol, clean pruning shears, fresh soil, and let's get to work.
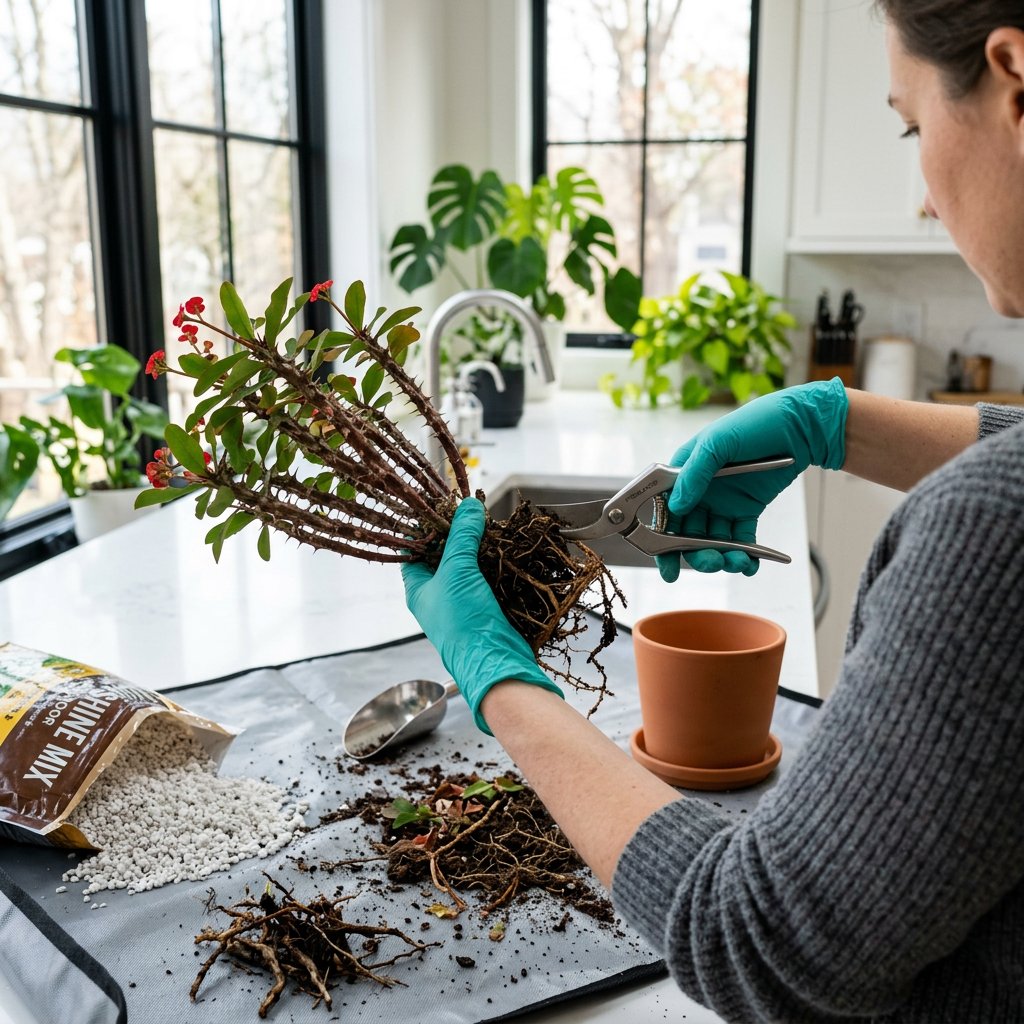
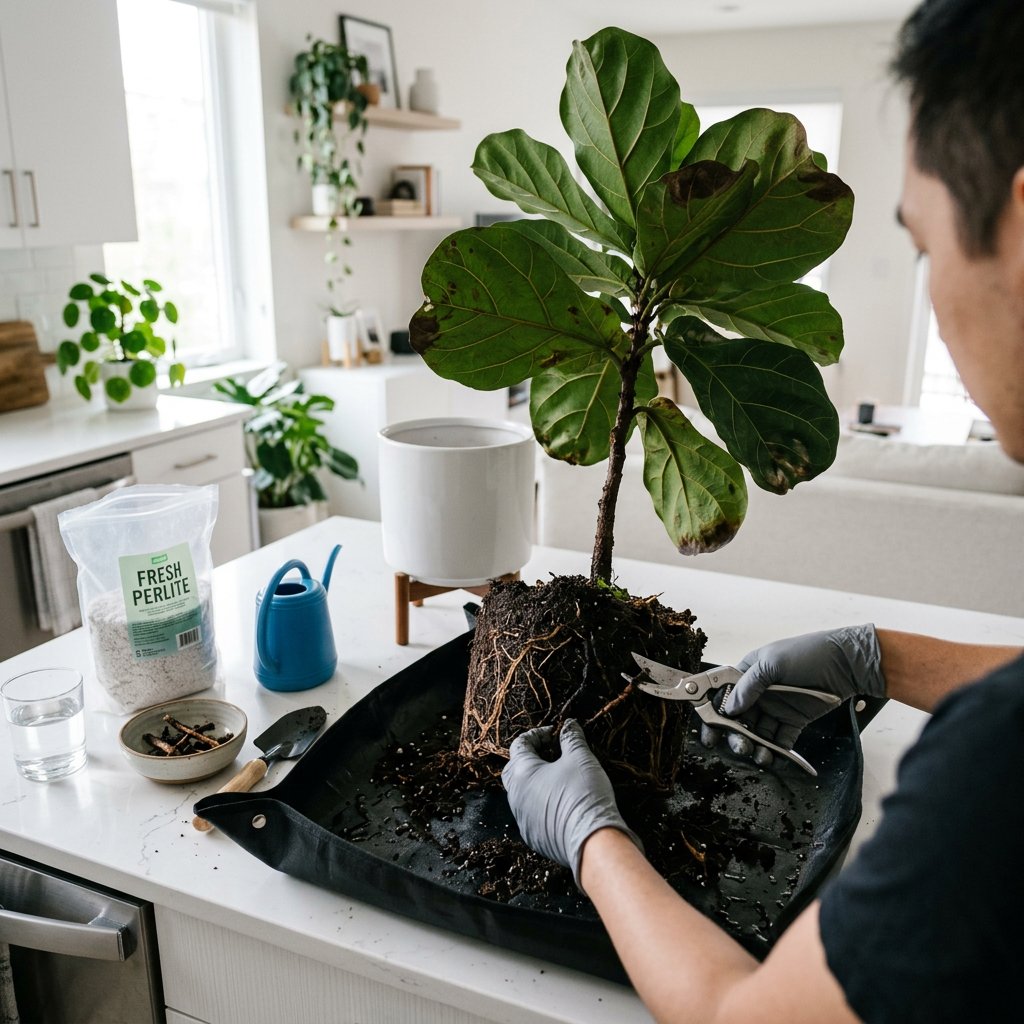
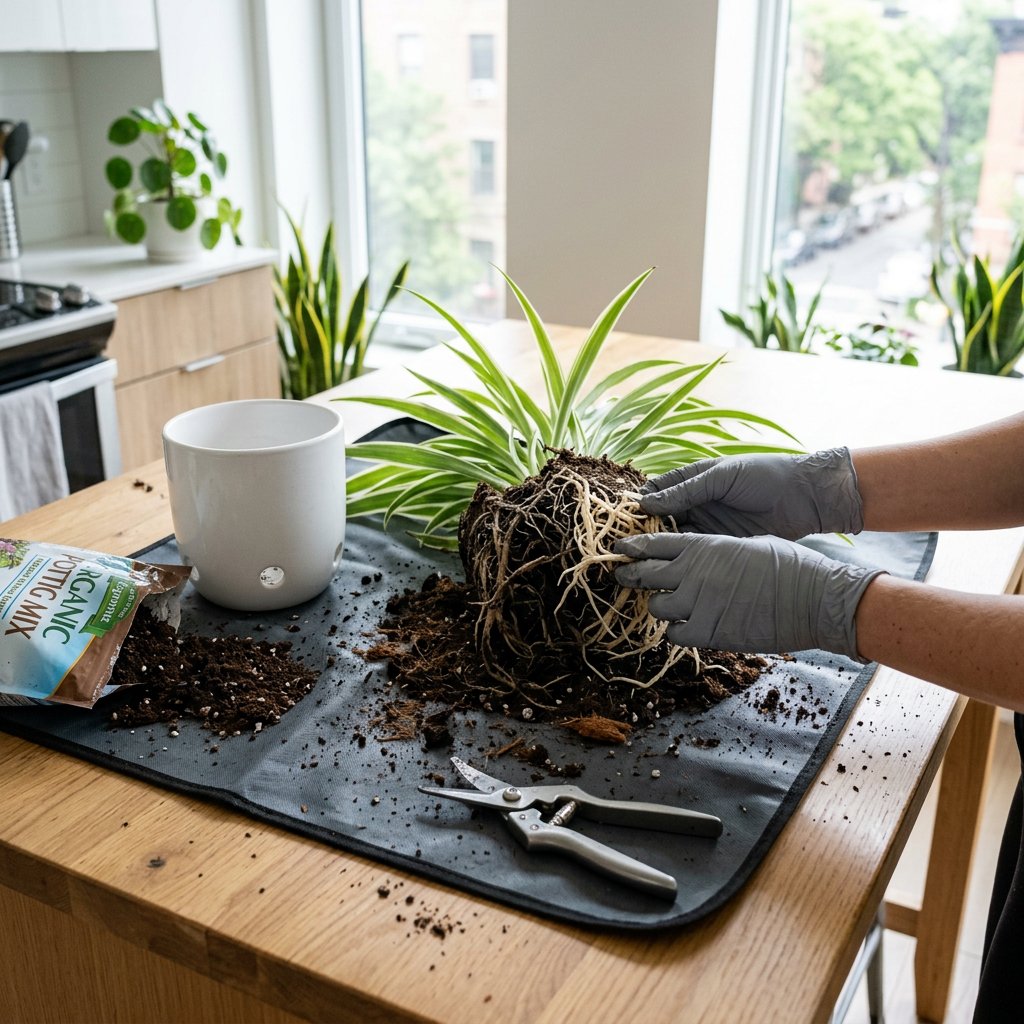
Step 1: Unpot and inspect the roots. Gently pull your spider plant out of its pot and massage the old, wet dirt away from the root ball. Healthy roots will look white or pale yellow, firm, and plump. Rotted roots will look dark brown or black, feel mushy, and may easily easily pull away, leaving behind a stringy core.
Step 2: Prune away the decay. Using scissors or pruning shears sterilized with rubbing alcohol, cut off every single mushy, dark root. Be ruthless here—leaving even a small piece of rot behind can allow the fungus to continue spreading. Wipe your blades with alcohol between cuts to prevent spreading the pathogen.
Step 3: Treat the remaining healthy roots. Once only firm, healthy roots are left, gently rinse them under lukewarm tap water. To give your plant extra protection against lingering fungal spores, you can dip the remaining roots in a mild solution of one part 3% hydrogen peroxide to three parts water.
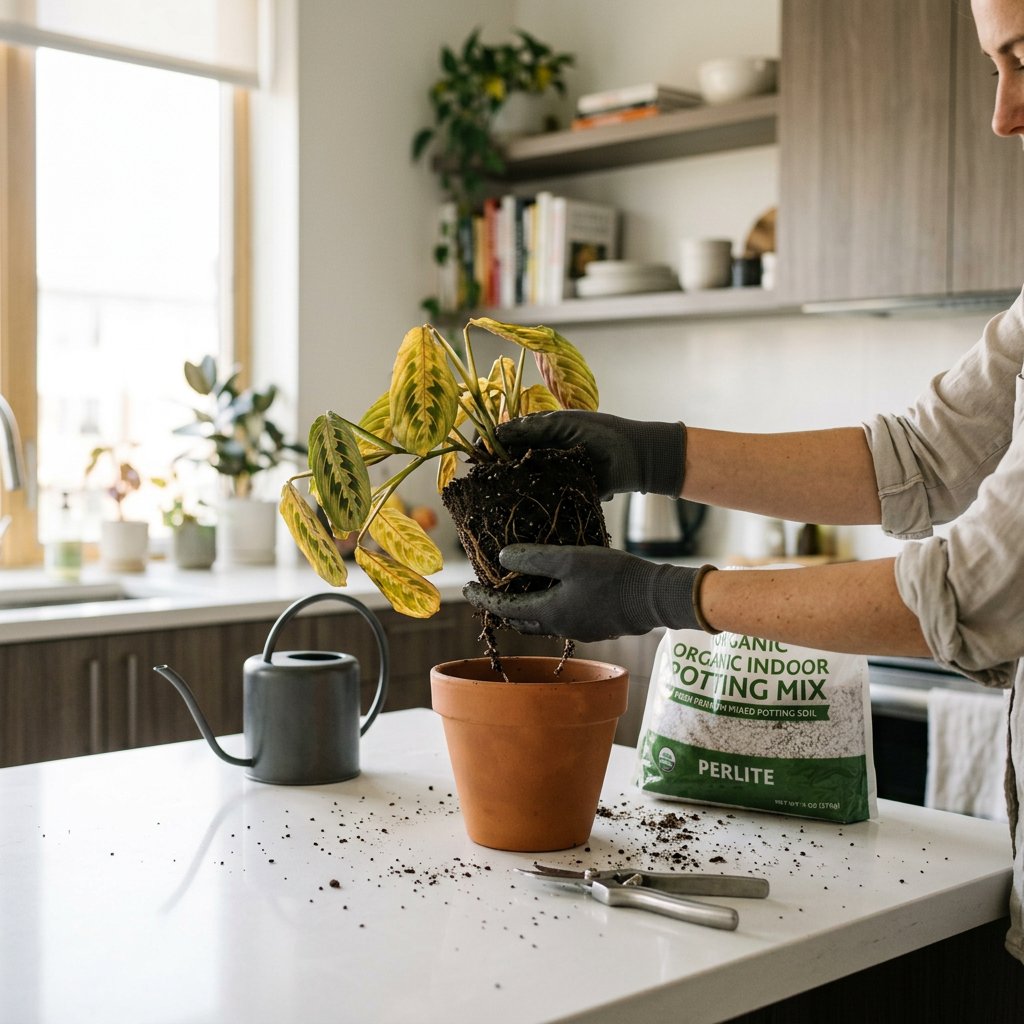
Step 4: Trim damaged foliage. Your spider plant will need to focus all its energy on regrowing a healthy root system. Help it out by snipping away any heavily yellowed, brown, or dying leaves at the base.
Step 5: Repot in an ideal environment. Throw away the old, infected soil and wash the pot thoroughly. Choose a pot with excellent drainage holes that is only slightly larger than the newly trimmed root ball. Use a chunky, well-draining potting mix—mixing a generous handful of perlite or orchid bark into standard indoor plant soil works wonders for aeration.
Step 6: Adjust your care routine. Wait a day or two before lightly watering your newly potted spider plant; this gives the cut roots a chance to callous and heal. Going forward, always allow the top two to three inches of soil to dry out completely before watering again.
Moving Forward with Confidence
Saving a plant from root rot is a major plant-parent milestone! It might take a few weeks for your spider plant to bounce back from the shock and start pushing out new growth, so be patient with it—and with yourself.
To help prevent future overwatering mishaps, you can easily set up customized watering schedules and smart care reminders in the Plantiary app. We are so proud of you for taking the time to rescue your plant, and we've got your back on this green journey, every step of the way!