Peace lilies (Spathiphyllum) are beloved for their elegant white blooms and lush foliage, but they are also famous for being wonderfully dramatic. If your once-vibrant green beauty is suddenly drooping and won’t perk up even after a drink, you might be dealing with the dreaded root rot.
First, take a deep breath! Plant issues happen to absolutely every plant parent, no matter how experienced you are. Over-loving our plants is one of the most common ways we accidentally harm them. If you are ever unsure what is wrong with your plant, you can use the AI-powered plant disease scanner in the Plantiary app to get a diagnosis in seconds. However, if you already suspect root rot has taken hold, let’s roll up our sleeves and save your peace lily together.
The Problem: Spotting the Symptoms of Root Rot
Because root rot happens beneath the soil, it often goes unnoticed until the plant shows signs of distress above ground. Here is what to look out for:
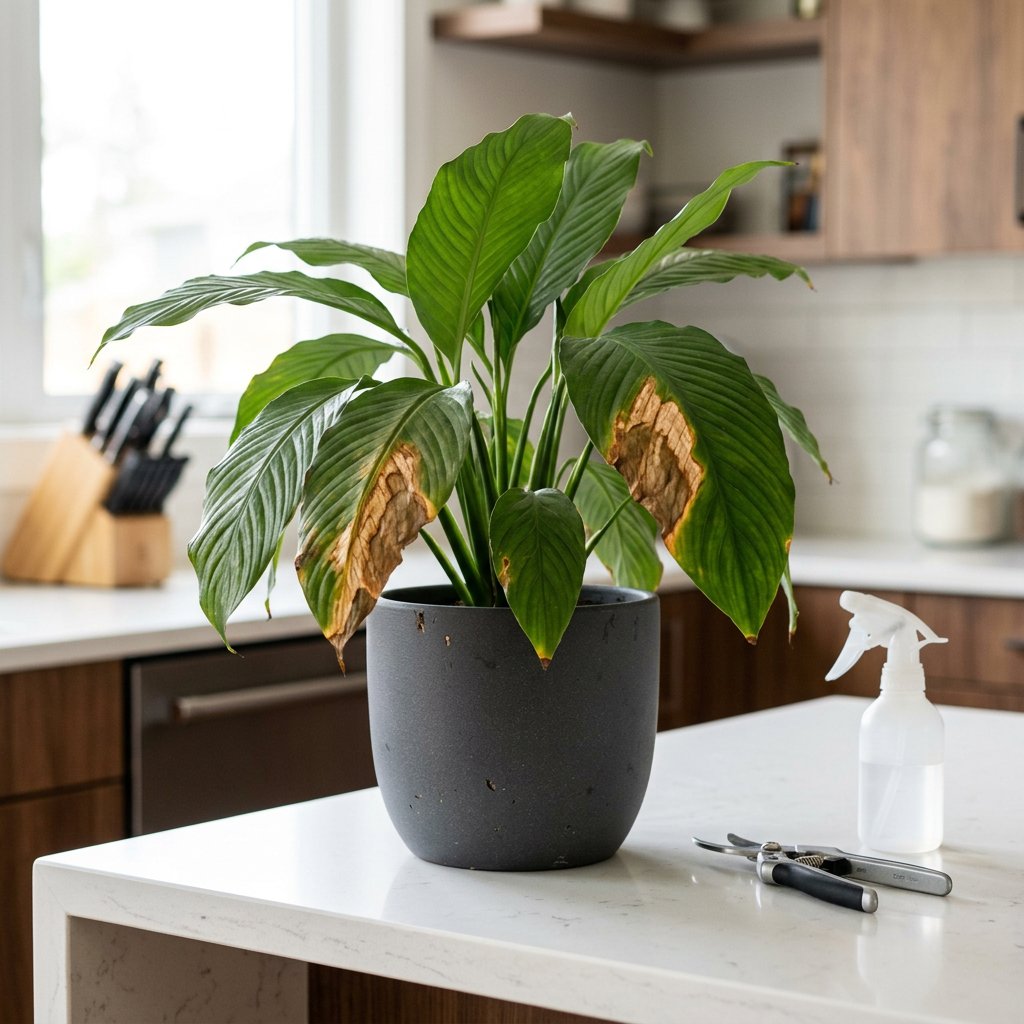
- Wilting despite wet soil: A peace lily will dramatically droop when it is thirsty, but if the soil is damp and the leaves are still limp, the roots are failing to absorb water.
- Chlorosis: This is the scientific term for the yellowing of leaves. When roots decay, they can't take up essential nutrients, leading to a pale, yellowing plant.
- Black or brown leaf edges: Unlike the crispy brown tips caused by low humidity, root rot often causes dark, mushy patches along the edges of the leaves.
- Foul odors: Healthy earth smells fresh. If your potting soil smells sour, swampy, or like rotten eggs, decay is happening below the surface.
- Mushy roots: Healthy peace lily roots are firm, fleshy, and light tan or white. Rotted roots are dark brown or black, slimy, and easily fall apart when touched.
The Causes: Why Does Root Rot Happen?
Root rot is primarily a fungal disease, but it is triggered by environmental conditions. Roots need oxygen to breathe just as much as they need water. When the soil is constantly waterlogged, the roots literally drown. This creates an anaerobic (oxygen-free) environment where opportunistic soil fungi thrive and attack the weakened root system.
The most common culprits include:
- Overwatering: Watering your peace lily on a strict schedule rather than checking if the soil is actually dry.
- Poor drainage: Using a decorative pot without drainage holes, allowing water to pool at the bottom.
- Dense soil: Using heavy, compacted potting soil that retains too much moisture and prevents airflow to the roots.
The Solutions: Step-by-Step Treatment
Treating root rot requires a little bit of plant surgery, but your peace lily is highly resilient. Follow these actionable steps to nurse it back to health:
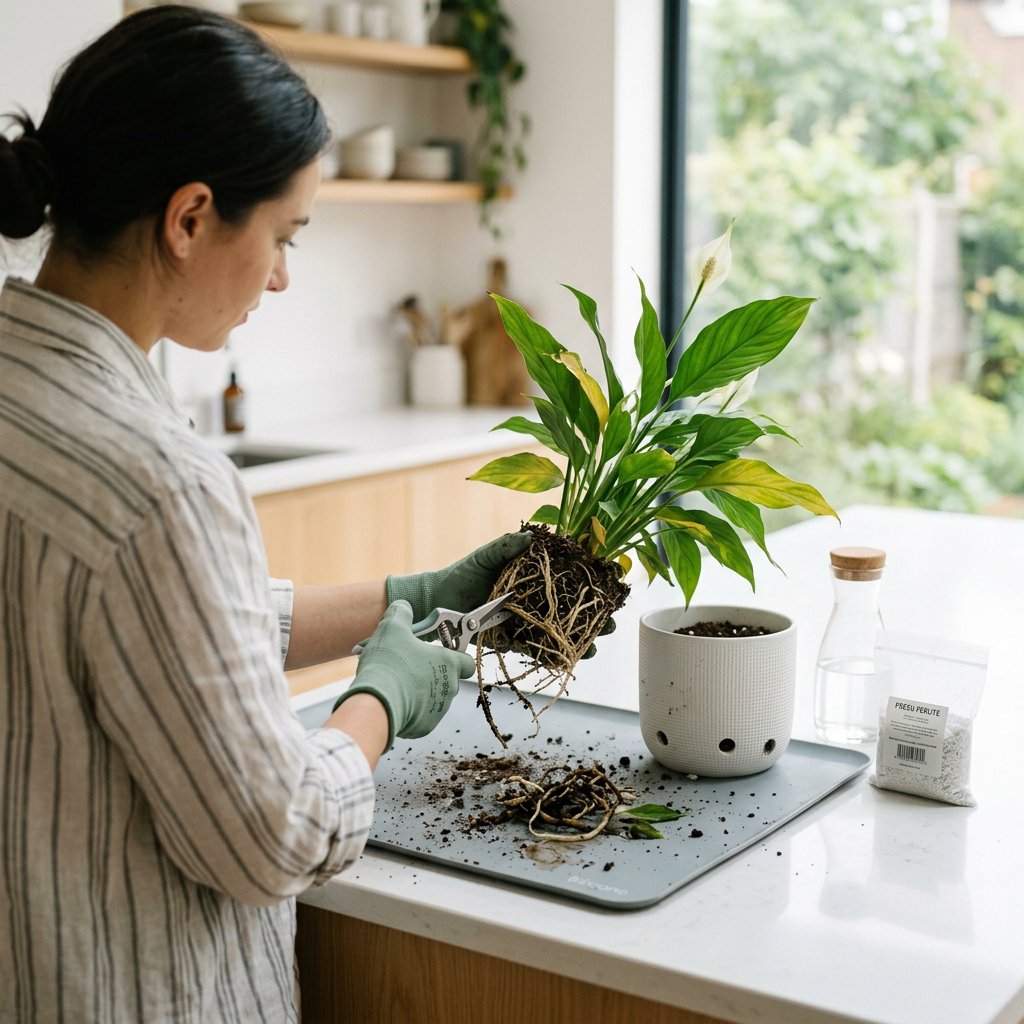
Step 1: Unpot and Inspect
Gently slide your peace lily out of its pot. Do your best to loosen and remove as much of the soggy, old soil as possible with your fingers. You can gently rinse the root system under lukewarm running water to get a clear view of the damage.
Step 2: Prune the Rot Away
Take a pair of sterilized scissors or pruning shears (wipe them with rubbing alcohol first to prevent spreading bacteria). Carefully snip away any dark, mushy, or stringy roots. Be ruthless here—leaving even a small piece of rotted root can cause the fungal infection to spread. Keep only the firm, light-colored roots.
Step 3: Treat the Healthy Roots
To kill any lingering fungal spores, you need to treat the remaining healthy roots. You can spray them with a commercial copper fungicide or use a safe, scientifically proven home solution: mix one part 3% hydrogen peroxide with two parts water, and briefly dip or spray the roots. This releases oxygen, which kills anaerobic rot bacteria.
Step 4: Repot in Fresh, Airy Soil
Never reuse the old, contaminated soil. Choose a new, thoroughly sanitized pot with drainage holes. Plant your peace lily in a fresh, well-aerated potting mix. A great blend for peace lilies is standard indoor potting soil mixed with a generous handful of perlite and orchid bark to ensure proper drainage and airflow.
Step 5: Adjust Your Care Routine
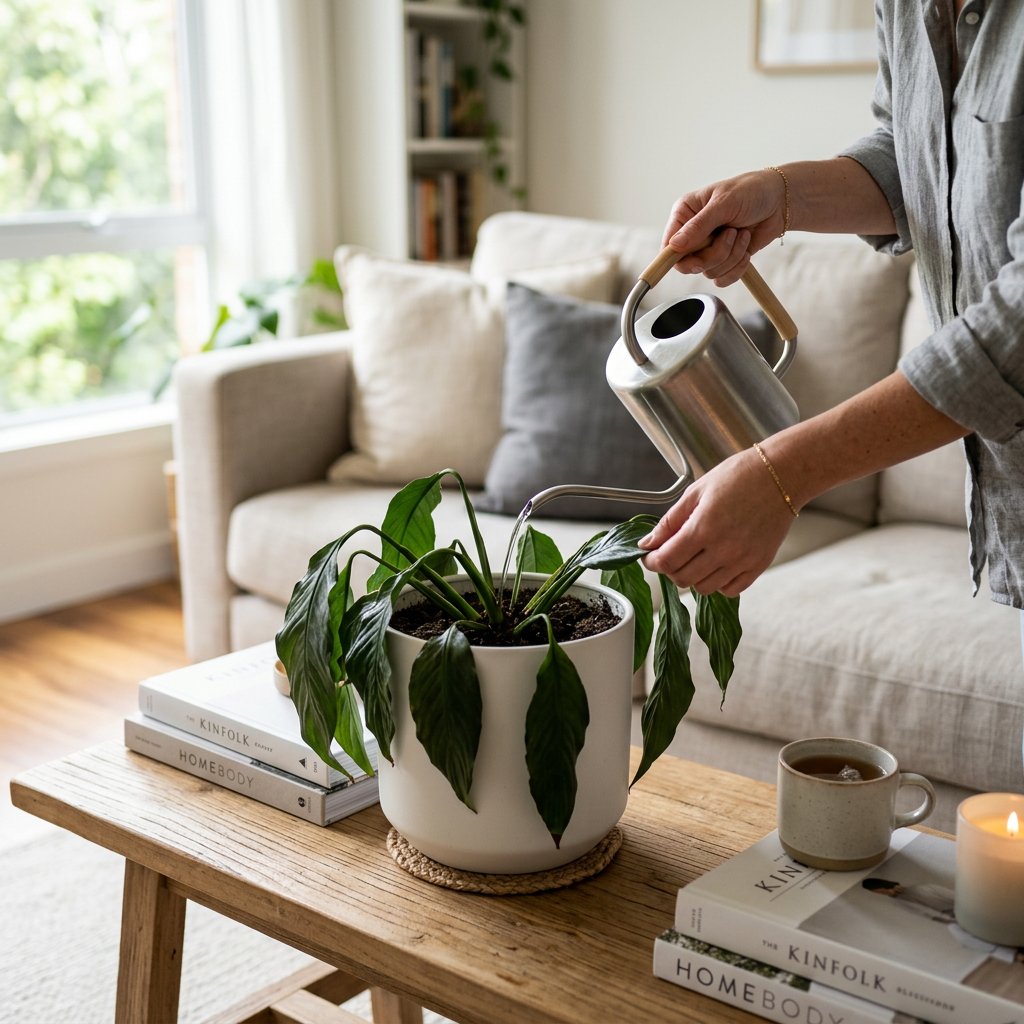
Your plant will likely experience some transplant shock, so place it in gentle, bright indirect light while it recovers. Going forward, only water your peace lily when the top two inches of the soil feel completely dry to the touch.
Recovering from root rot takes time, so be patient with your plant as it regrows its root system. To help you stay on track and avoid future overwatering, don't forget to set up customized watering schedules and care reminders in the Plantiary app. You've got this!