ZZ plants (Zamioculcas zamiifolia) are famous in the houseplant world for being almost indestructible. They happily tolerate low light, thrive on neglect, and add a striking, architectural look to any room with their glossy green foliage. But if you have noticed your trusty ZZ plant looking a little sad, yellow, or mushy, you might be dealing with the one true kryptonite of this resilient species: bulb rot.
First of all, take a deep breath! Please do not feel guilty. Plant issues happen to absolutely every plant parent—even the seasoned experts. Loving our plants sometimes means we accidentally give them a bit too much water, and thankfully, ZZ plants are incredibly forgiving once you help them get back on track. Let's dive into how to identify, understand, and cure this common issue.
The Problem: Identifying ZZ Plant Bulb Rot
Before we talk about rot, it helps to know what is actually rotting. The "bulbs" under the soil of your ZZ plant are botanically known as rhizomes. These are thick, potato-like underground stems that act as massive water reservoirs, allowing the plant to survive long droughts.
When these rhizomes succumb to rot, the plant can no longer take up nutrients or water properly. Here are the tell-tale symptoms:
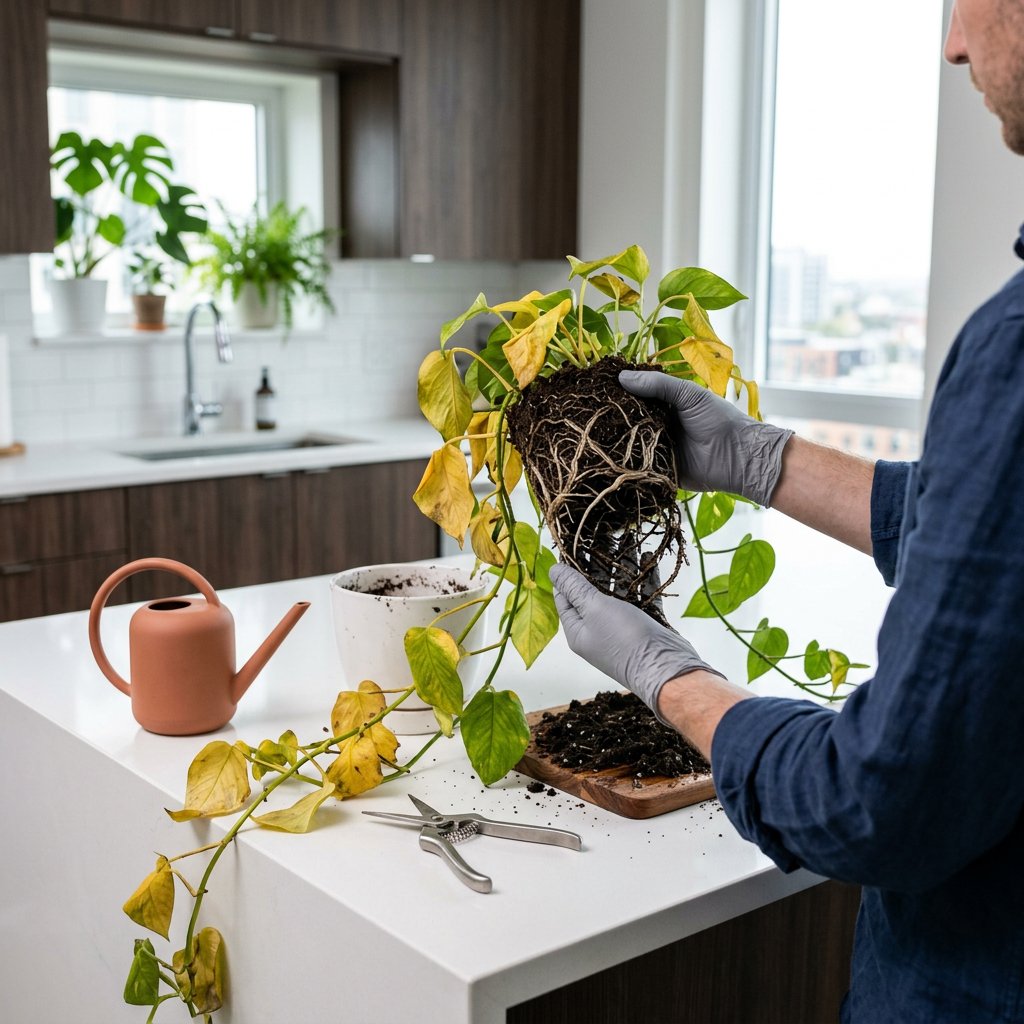
- Yellowing leaves: Usually starting at the bottom of the plant and moving upward. (This is a condition known as chlorosis, which simply means a loss of green pigment).
- Mushy or wrinkly stems: The base of the stalks may feel soft, hollow, or easily collapse under their own weight.
- Falling stems: Whole stalks might easily detach from the soil line with a gentle tug.
- A foul odor: If you lean close to the soil, it might smell swampy or decaying.
If you are seeing some of these signs but aren’t completely sure what is wrong, you can always use the AI-powered plant disease scanner in the Plantiary app to get a fast, accurate diagnosis in seconds!
The Causes: Why Do Rhizomes Rot?
Rhizome rot is almost exclusively a fungal or bacterial issue brought on by excess moisture. Because those underground "potatoes" are already full of water, sitting in soggy conditions literally suffocates them. The most common culprits include:
- Overwatering: Watering your ZZ plant on a strict weekly schedule regardless of whether the soil is dry.
- Poor Drainage: Keeping the plant in a decorative pot without drainage holes, allowing water to pool at the bottom.
- Dense Soil: Using heavy, moisture-retaining potting mixes that do not allow airflow to the roots.
The Solutions: Step-by-Step Treatment to Save Your ZZ Plant
If you have confirmed rot, you will need to get your hands a little dirty. Put on some gloves, grab a pair of sharp, sterilized pruning shears, and follow these actionable steps:
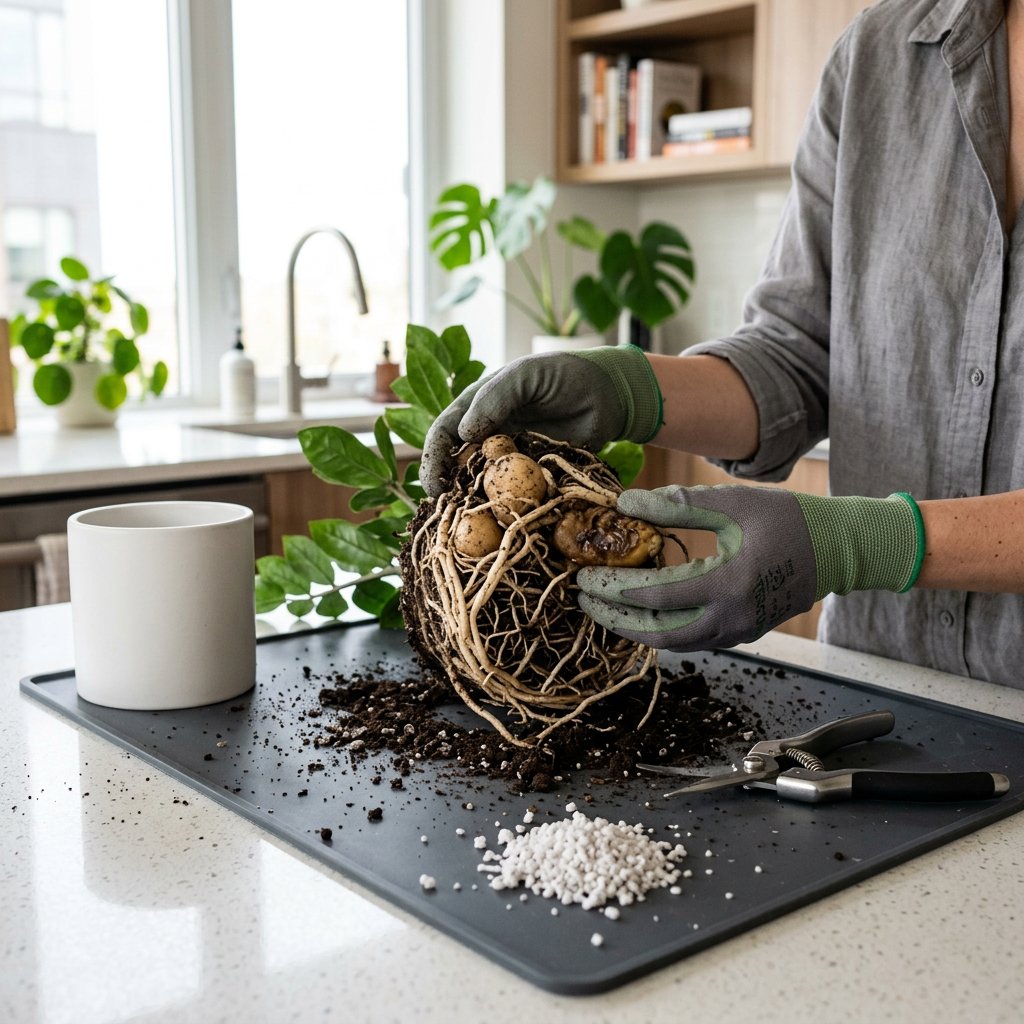
Step 1: Unpot and Inspect Gently pull your ZZ plant out of its pot and massage the old dirt away from the roots. Take a close look at the rhizomes. Healthy rhizomes and roots are firm, plump, and white or light tan. Rotted areas will be dark brown or black, slimy, and mushy to the touch.
Step 2: Prune Away the Rot Using your sterilized shears, bravely cut away any mushy roots and rotted sections of the rhizome. You must remove all of the rot, or it will continue to spread. It is better to have a smaller, healthy plant than a large, dying one. Make sure to wipe your shears with rubbing alcohol between cuts so you don't spread the bacteria.
Step 3: Treat the Remaining Rhizome To kill off any lingering fungal spores, spray the healthy, newly cut rhizomes with a copper-based fungicide or a mild hydrogen peroxide solution (mix 1 part standard 3% household hydrogen peroxide with 2 parts water). Let the plant sit out on a towel in a shaded spot for a few hours. This allows the fresh cuts to callus (form a protective dry scab), which prevents future rot.
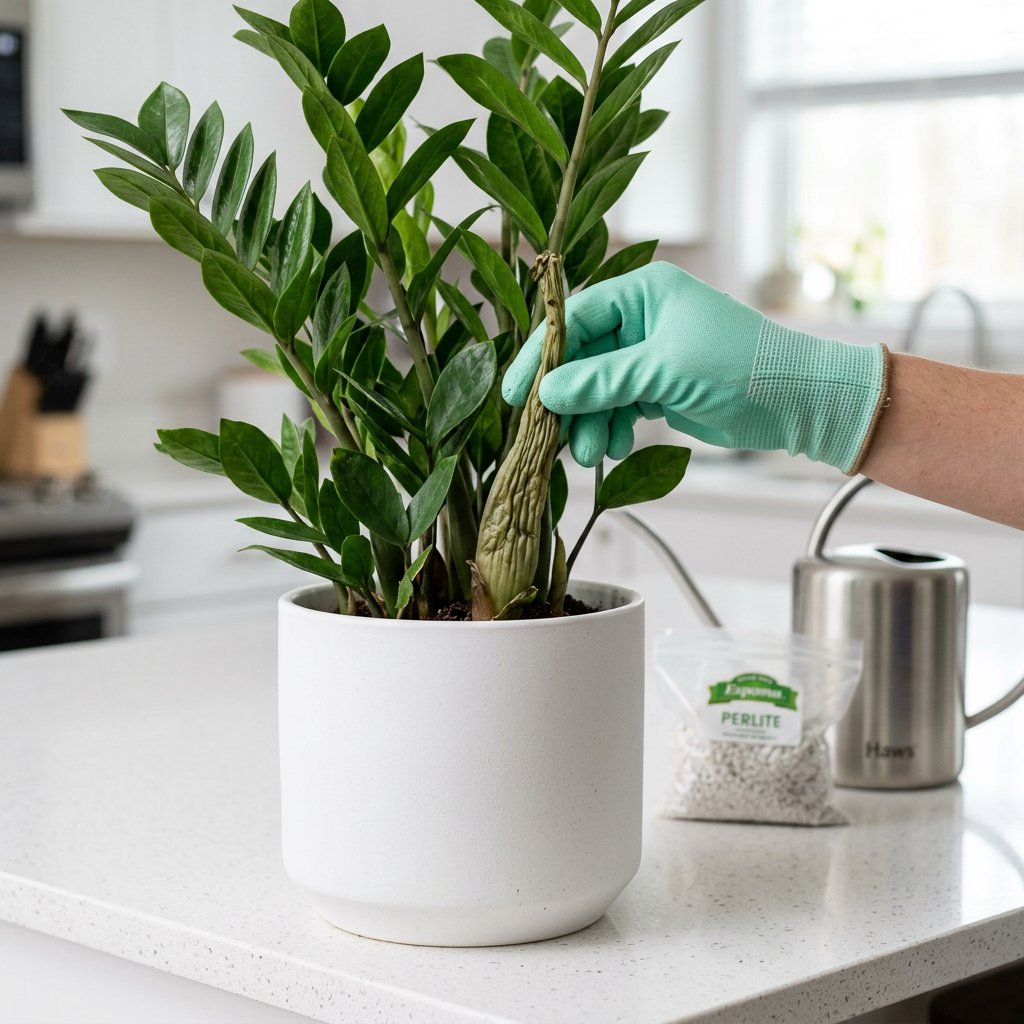
Step 4: Repot in Fresh, Airy Soil Throw away the old, contaminated soil. Repot your saved ZZ plant into a container that absolutely must have drainage holes. Use a highly aerated, well-draining soil—a commercial cactus or succulent mix blended with a handful of perlite is perfect for keeping those rhizomes happy and breathing.
Step 5: Adjust Your Watering Habits Do not water the plant immediately after repotting; give it about a week to settle in. Going forward, only water your ZZ plant when the soil is 100% dry all the way to the bottom of the pot. To make this effortless, you can set up a customized, weather-aware watering schedule in the Plantiary app to ensure you never overwater your green friend again.
A Fresh Start for Your ZZ Plant
Plant recovery takes time, so be patient with your ZZ plant as it establishes new, healthy roots. You might lose a few more leaves as it recovers from the shock, but with the right soil, proper drainage, and a little bit of loving neglect, your resilient ZZ plant will bounce back and push out beautiful new growth before you know it.